My 8 Tips for Refinishing Furniture

One of my favorite, yet most time consuming, patience-testing projects was this dresser for the baby’s bedroom closet. After spending over 3 weeks on it (during quarantine, no less!) I learned a few things that I want to share with you if you’re considering tackling refinishing a piece of furniture for the first time, too.
I loosely followed The Coastal Oak’s tutorial, so if you’re looking for a full step-by-step, check her out. I’m just here to share some of my main takeaways. I hope this helps you pick the right piece to refinish, and makes it a little easier for you if it’s your first time.
1. The less detail in the furniture, the better.
If you can, avoid too many spindles and/or nooks and crannies. Obviously these aspects are what really add character to the piece, but they will definitely make it more difficult. For this piece, I had to follow all the regular steps, plus a lot of picking out stripped paint from the nooks and crannies, plus several different sanding tools, including a dremel. And dremels are risky because they gauge wood super easily!


2. The more layers of paint, the more difficult to remove.
My dresser had 5-6 coats of paint. I didn’t notice when I first bought it and I didn’t even think twice about whether that would matter or not. It ended up making it extra hard to sand through, and I could tell the difference because there were some edges that only had a coat or two and those were a breeeeeeeze to sand off. That being said, if you’re removing layers and layers of paint . . .
3. You may need higher grit than you think.
I ended up going as low as 40 grit to sand off the paint. I was nervous it would damage the wood, but it didn’t. In the case that it does, you can always sand again in a lower grit like 120 to clean it up. Please note that you probably shouldn’t sand with 40 grit straight over raw wood — only to remove many layers of old paint! And on a similar note . . .
4. You will need multiple types of sandpaper and grit styles.
I used a belt sander, a power hand sander, sanding sponges, and a manual hand sander, all in various grits, ranging from 40-120.
The belt and power sanders were to get the paint off. I used the corners of sanding sponges to get in between the spindles on the legs and in parts of the swirly design on the front. I used the manual hand sander for touch ups. Whew!
5. This is an outdoor project
Unless you have a huge garage and you can section off part for your project, you’ll want to do this outside, so consider the season and weather. It’s very messy from all the sanding, and you’ll want it to be ventilated when you’re using the Citristrip and bleach.
6. Consider if the furniture is older than 1978.
In which case, if there’s paint on it, it could be lead based paint, which is toxic. My dresser seemed really old based on the condition so I wore a mask the whole time I sanded.

7. Try to avoid veneer if at all possible
Veneer is the worstttttttttt. It’s what made me give up on a refinishing project last fall. Veneer is a thin cut of wood or MDF on top of solid wood. You’ll want to remove it to ensure the texture and color of your whole piece is consistent. I ended up blowing a hair dryer over the veneer (it loosens up the glue used to apply the veneer) and scraped a large majority off. I sanded the rest but it was very time consuming and a major pain in the butt, even with 40 grit!
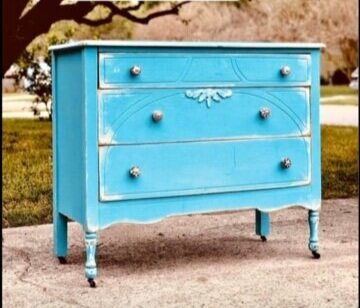
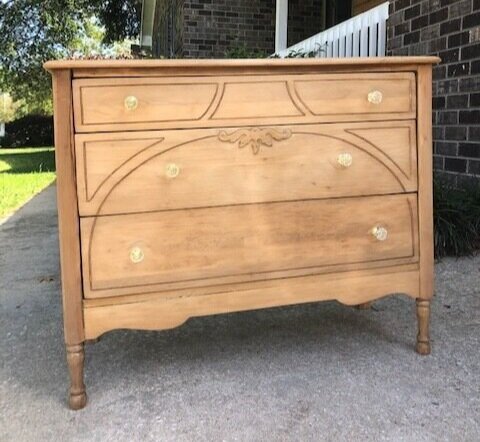
8. OK if this didn’t totally scare you, refinishing furniture is definitely worth it and will probably be easier next time around!
During the last week or so of this project, I was cursing it and saying I’d never do it again. But now I know what I’m doing, what to avoid, and what to expect, so I just may try again some day! I’m so happy with how it turned out and I’m glad I didn’t give up. I mean, check out this before and after!!