Before & After | Master Bedroom/Master Bathroom
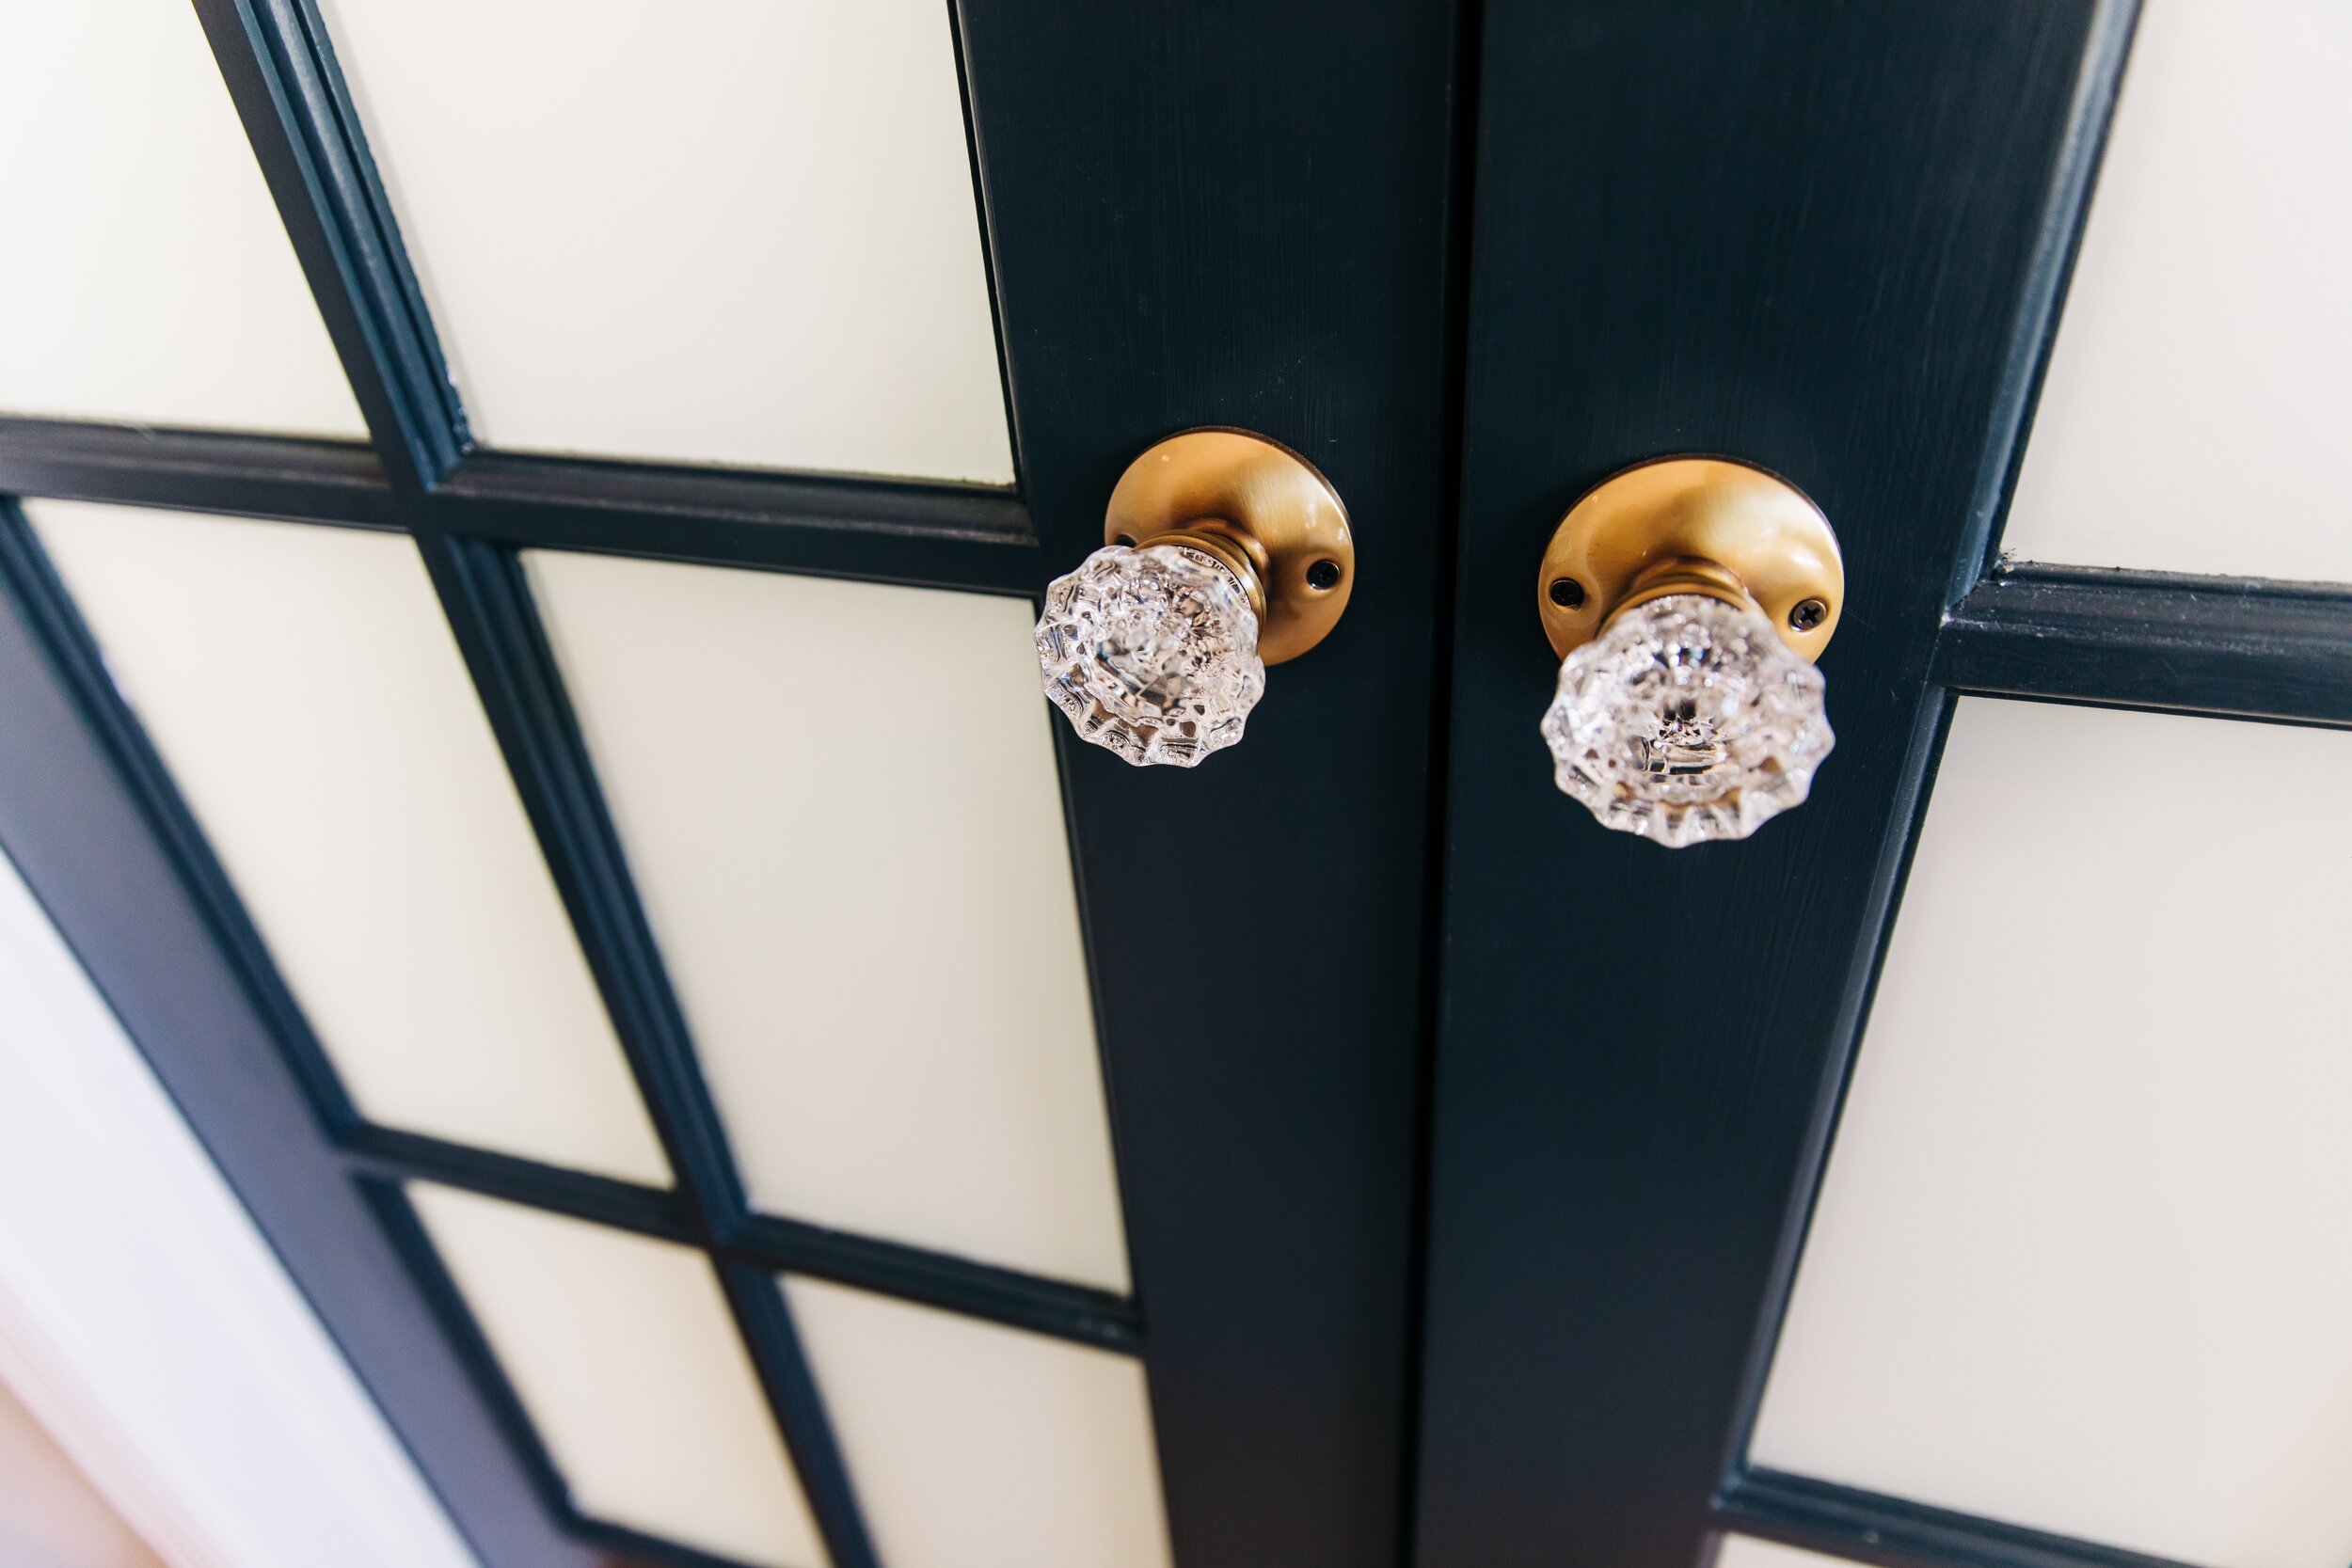
photo by dreampop media
This is my FAVORITE transformation in the house. Mainly because it was the most extensive renovation we have done so far. We are so happy with how it turned out!
First let’s have a look-see at what we were working with when we moved in.

Yikes! Amirite?! As soon as we moved in, we painted everything, like we did in the rest of the house. Ceiling, walls, and trim. We also replaced the ceiling fan.
For over a year we were making do in the bathroom but it was a lost cause.

Yikes again. But we made do until we felt we could swing the cost and time to tackle this project.
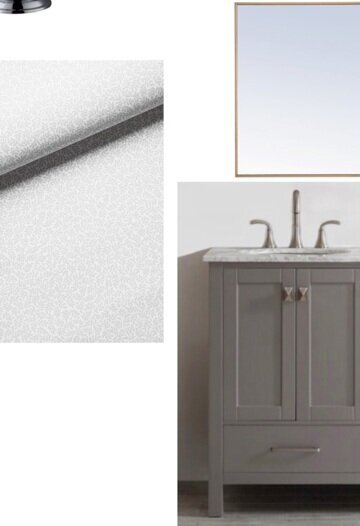
The first step was picking out the vanity, mirrors, and faucets. I also found a lovely textured wallpaper for the wall behind the mirrors. This is what I came up with. I purposely mixed metals so everything wasn’t too matchy-matchy.
I loved this vanity and got it on sale during one of Wayfair’s big annual sales. Reasons why I still love it: The cabinets and drawers are soft-close. It provides a lot of storage, and I love the color scheme.
The mirrors are from All Modern.
Faucets (not pictured here) are Glacier Bay from Home Depot. *Tip* I went on the cheaper side on the faucets, which I shouldn’t have done. Especially if you’re going to be in your home awhile, it’s worth spending more money on brands like Kohler, Moen or Delta. We haven’t had any issues yet but they’re prone to leak over time.
Bathroom hardware (towel ring, toilet paper holder and towel rack) are a matching set by Moen I got on Amazon. (bought separately). They also come in brushed nickel.
The wallpaper is Serena and Lily and it’s super on sale now! *Tip* Hire someone to hang wallpaper unless you or someone you know is experienced in it, or if you are a perfectionist. It is NOT easy and my mom and I’s installation was, let’s say, flawed.
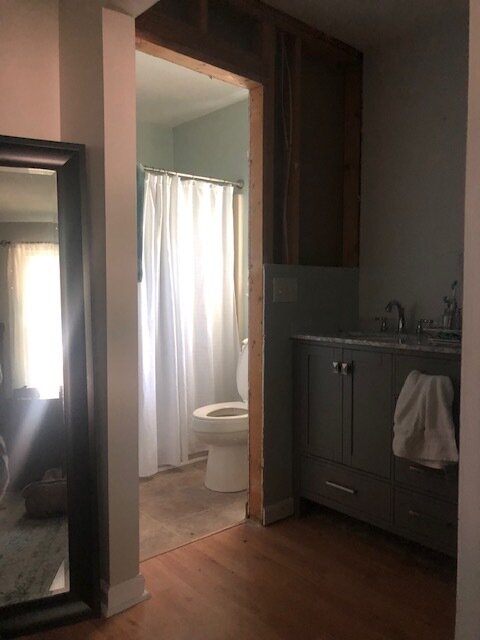
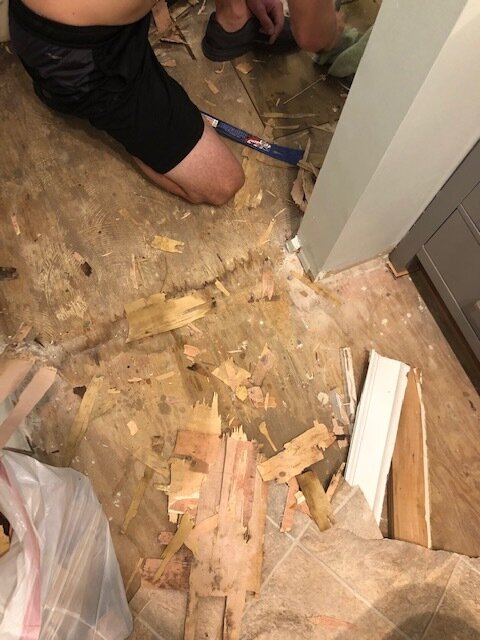
Below are some progress photos from the vanity and wallpaper installation. Major props to my dad and husband for their hard work. They did just about everything except the wallpaper.


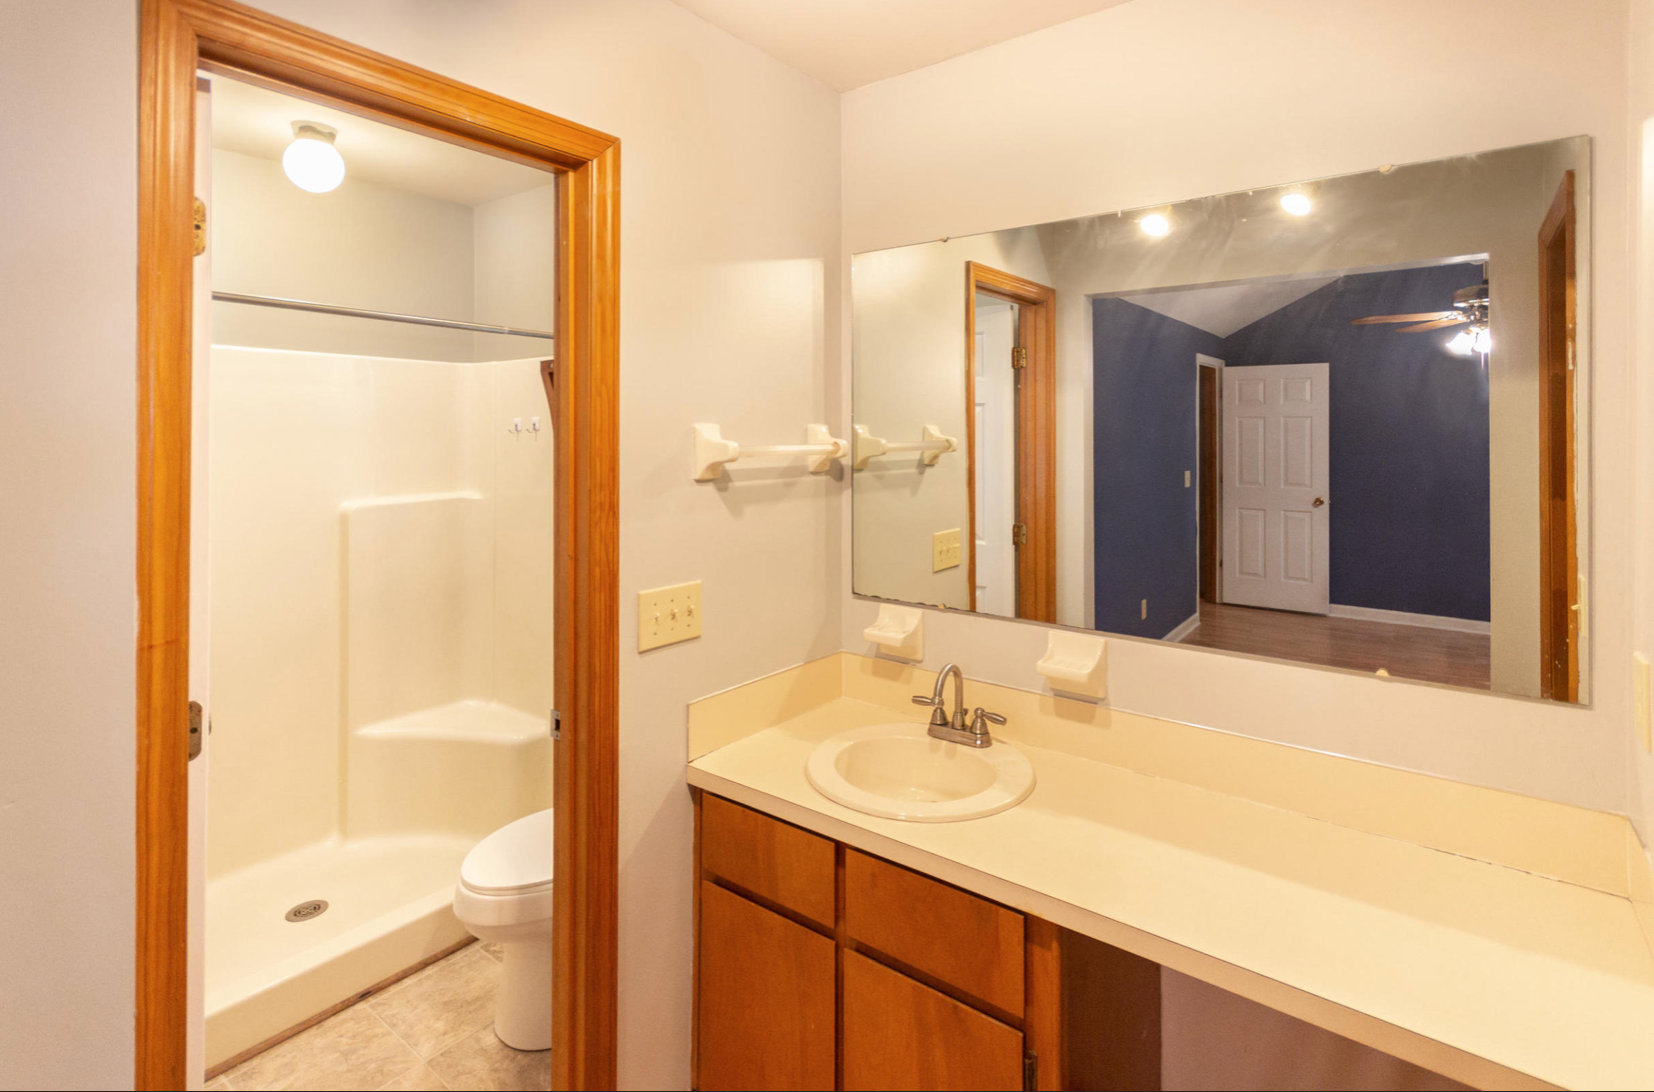
We hung out with the bathroom like this for a few months. Then, because my brain never stops, I decided that we should remove the door to the shower/toilet (to the left), and cut down that wall to a half-wall. This was in anticipation to put doors in and make the bathroom an actual room. Scroll back up to the first photo and you’ll see what I mean. This “sunken” bathroom is very common in 1980’s homes here in Charleston. I see them a lot “in the biz”. I don’t know why it was ever kool. After a few months, we were ready to be able to sit on the toilet without the bathroom door hitting our knees :D
So we hired an electrician to move the electrical wires for the light switches into the back wall so we could cut down that wall to the left of the vanity.
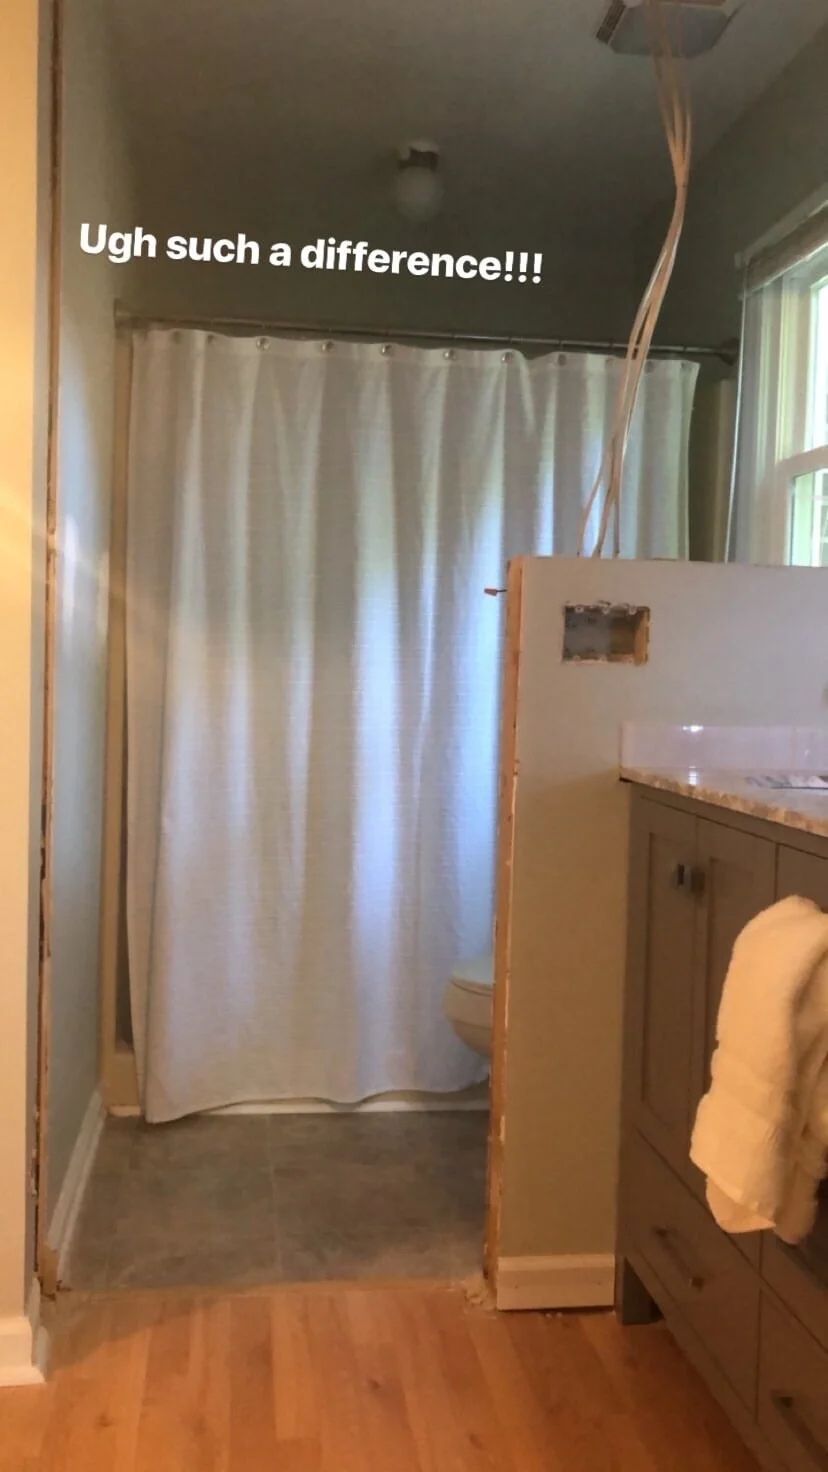

This was already way better, but we needed a door. We lived without a bathroom door for a couple months and it was a little tricky ;) But we did enjoy how much light the bedroom and bathroom got with the wall cut down and no doors in the meantime.

We ordered french doors from Lowe’s. Solid wood doors are pretty expensive, turns out. Plus we wanted “frosted” glass to ensure privacy but to also let light in and out, which was an added expense. We ordered it primed and not painted to save money. *Tip* Pay the extra money to have the door painted by them. It was very tedious to tape in between each glass pane before painting, and then we had to use a box cutter to cut the protective plastic out of each pane. It was nearly impossible to get every piece of plastic out, and then the box cutter cut into the wood a little bit, which also cut out little bits of paint. UGH. So now it’s imperfect and it drives me a little nuts, but other people probably wouldn’t notice.
Also, I ordered it to have the glass on the bedroom side and the frosted part on the bathroom side. I didn’t realize until after we had the doors installed, that they made it opposite. Another thing that other people probably wouldn’t notice, but pay attention to that when you order doors and then double check when you receive them!
I chose a dark blue to accent our area rug with specks of dark blue, plus I liked the idea of something darker against the light color palette in the bathroom. It’s called Blindfold and I’m not sure who it’s by, sorry!
FYI installing doors is a pain in the butt— just ask my husband. Getting them in the doorway perfectly, with a perfect gap in between the doors, nothing crooked, etc is very meticulous.


I absolutely love how the doors turned out. I love the style of crystal doorknobs that are often seen in the historical homes downtown, so I bought a similar set on Etsy. They might be my favorite part of the whole bathroom renovation.

photo by dreampop media
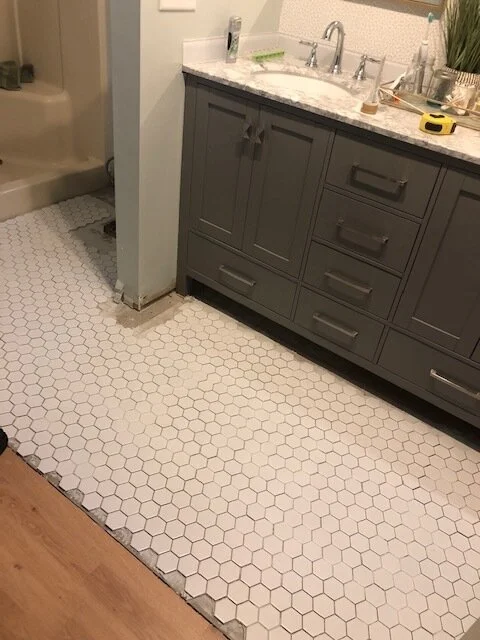
aaaaand onto the flooring. Yes we should have done this first. *Obvious Tip* If you plan on replacing flooring in the near-ish future, just spend the money up front and do it before doing the other updates. We didn’t want to spend even more money on the floors so we held off, and ended up doing it very shortly after anyway. Silly!
The tile we selected is small white hexagon tile we got from Lowe’s. We used this same tile in the guest bathroom which I will reveal soon!
Here is the project completely done!

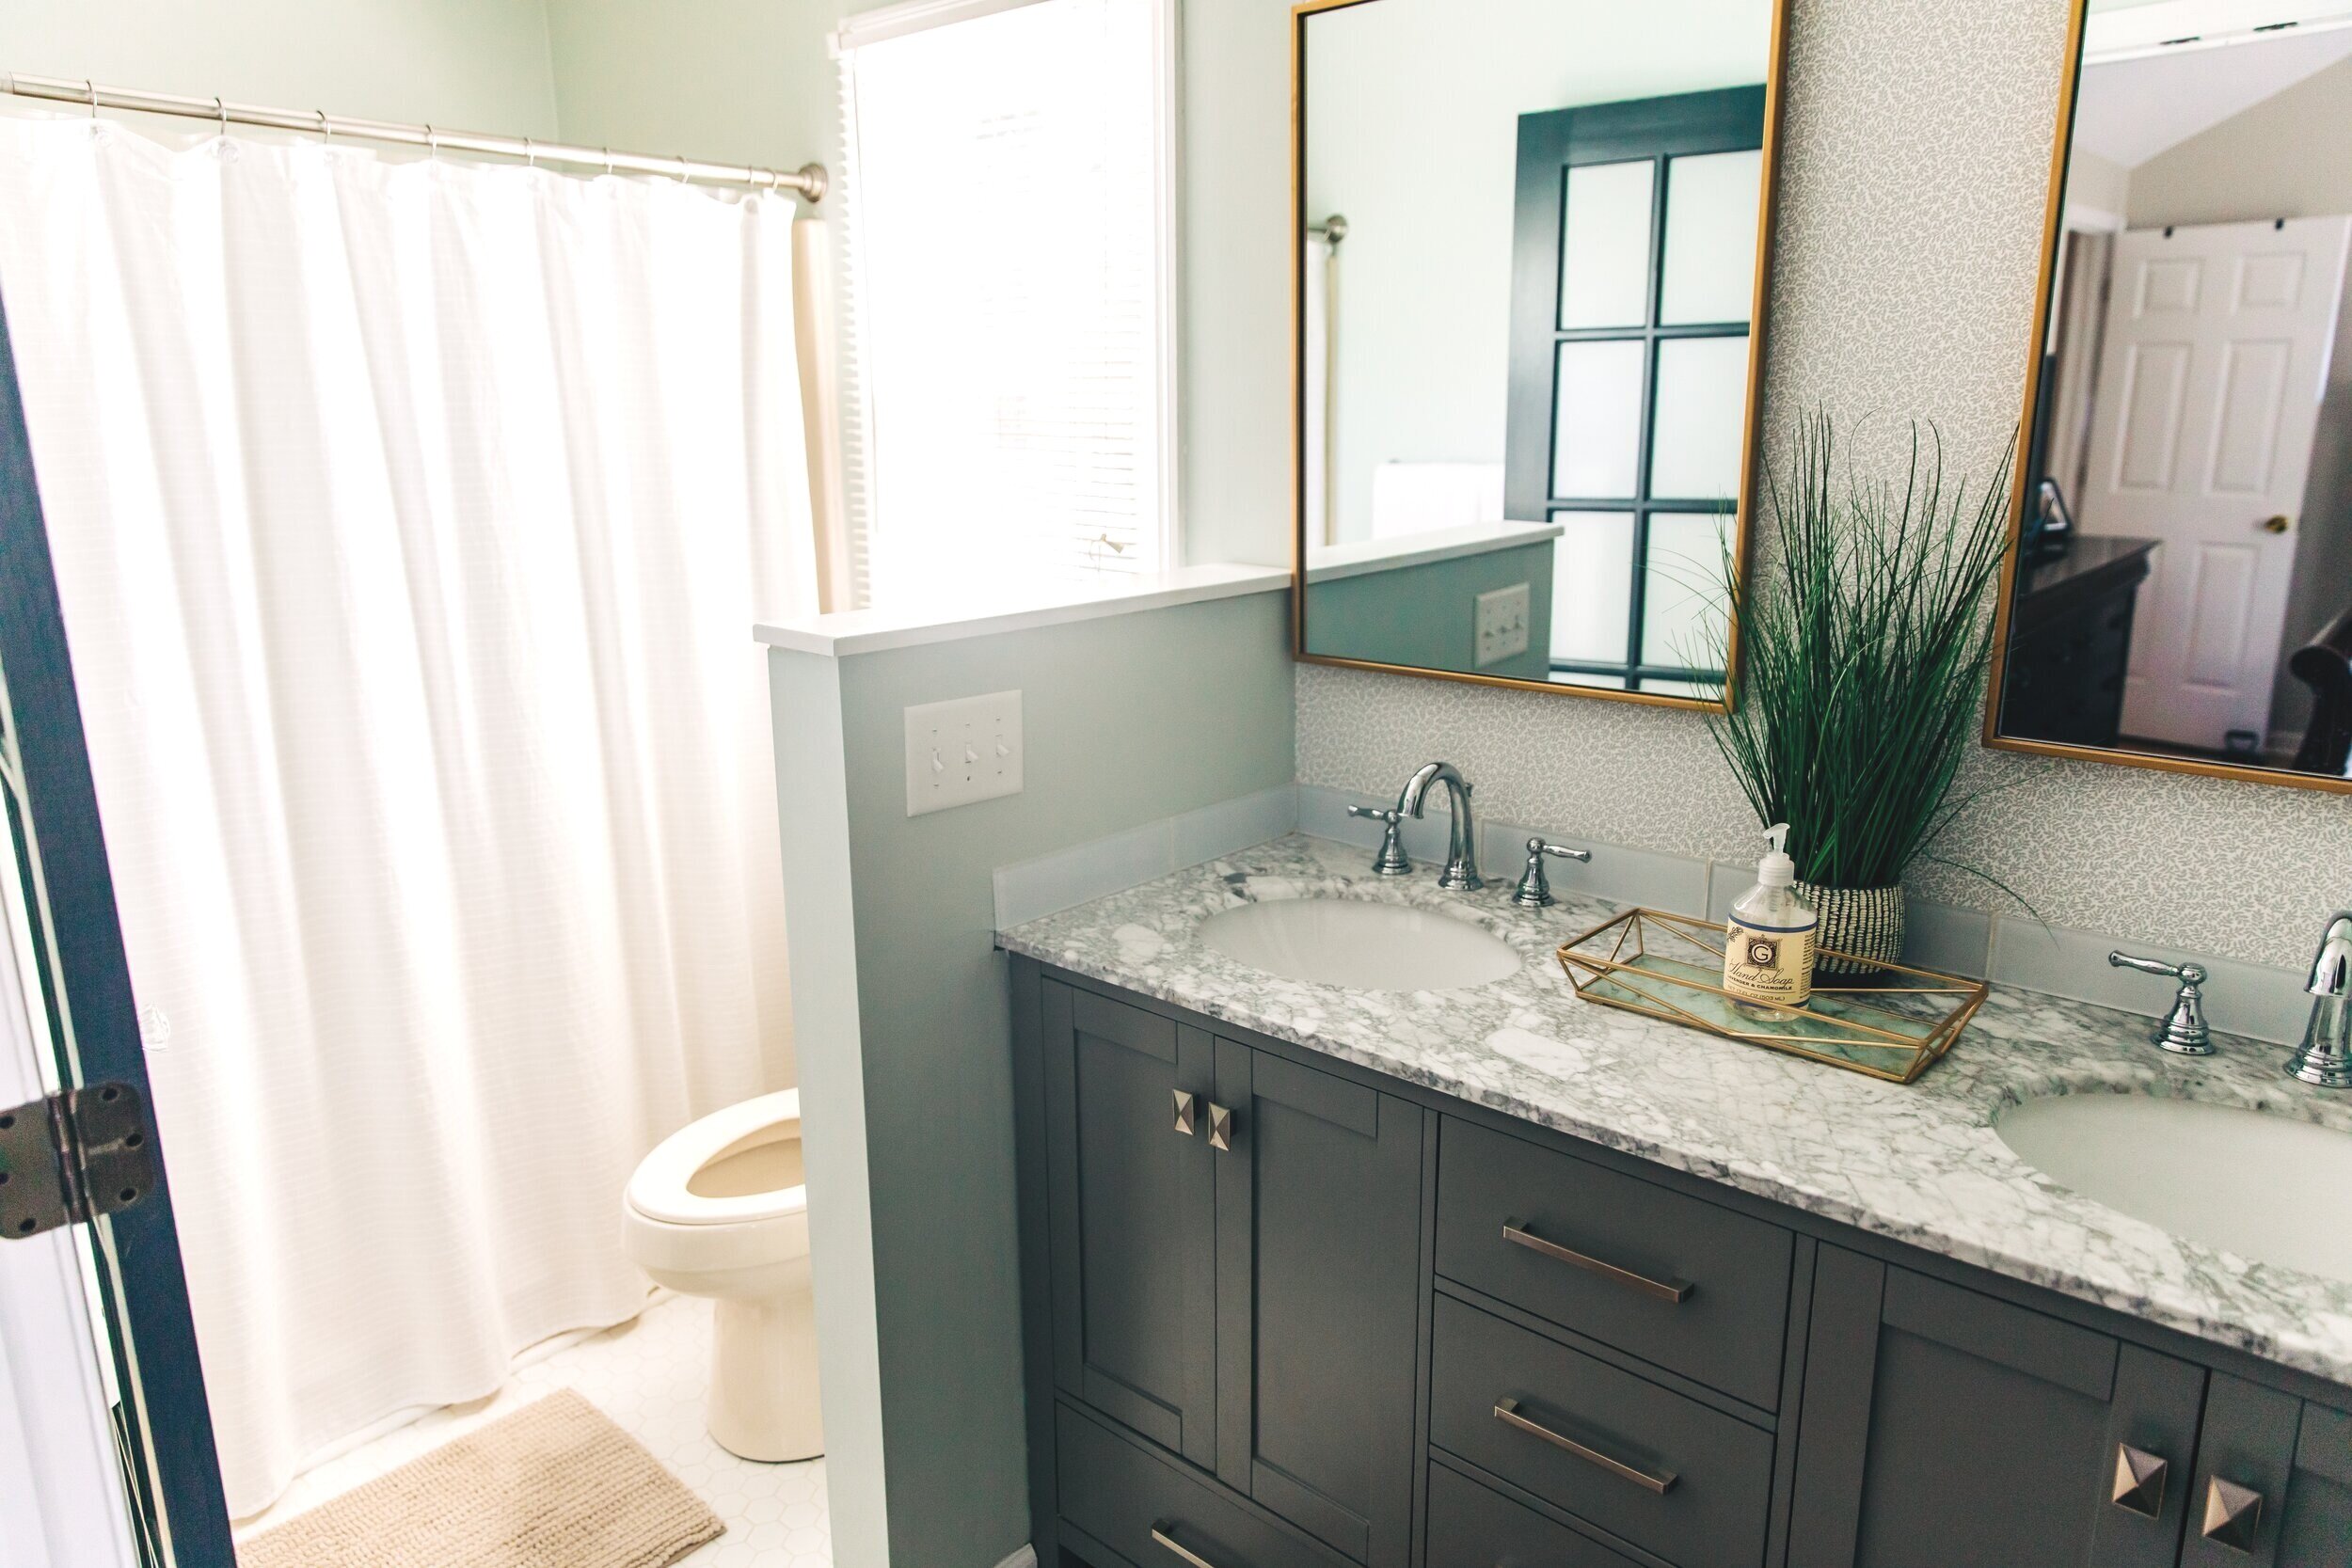

photo by dreampop media

photo by dreampop media
I can’t forget to mention that this gorgeous Turkish rug is straight from Turkey! I got it from Zuma Imports, at their space in Mt Pleasant Mall. What I love about their rugs, other than that they’re so pretty and come in so many different color schemes, is that they come in all different sizes. Not standard sizes, but random sizes. Which I think is awesome because not all our spaces in our houses are “standard” size.
Onto the bedroom. . .
Here’s a reminder image of what our bedroom looked like when we moved in, and keep scrolling to see what it looks like now.


photo by dreampop media
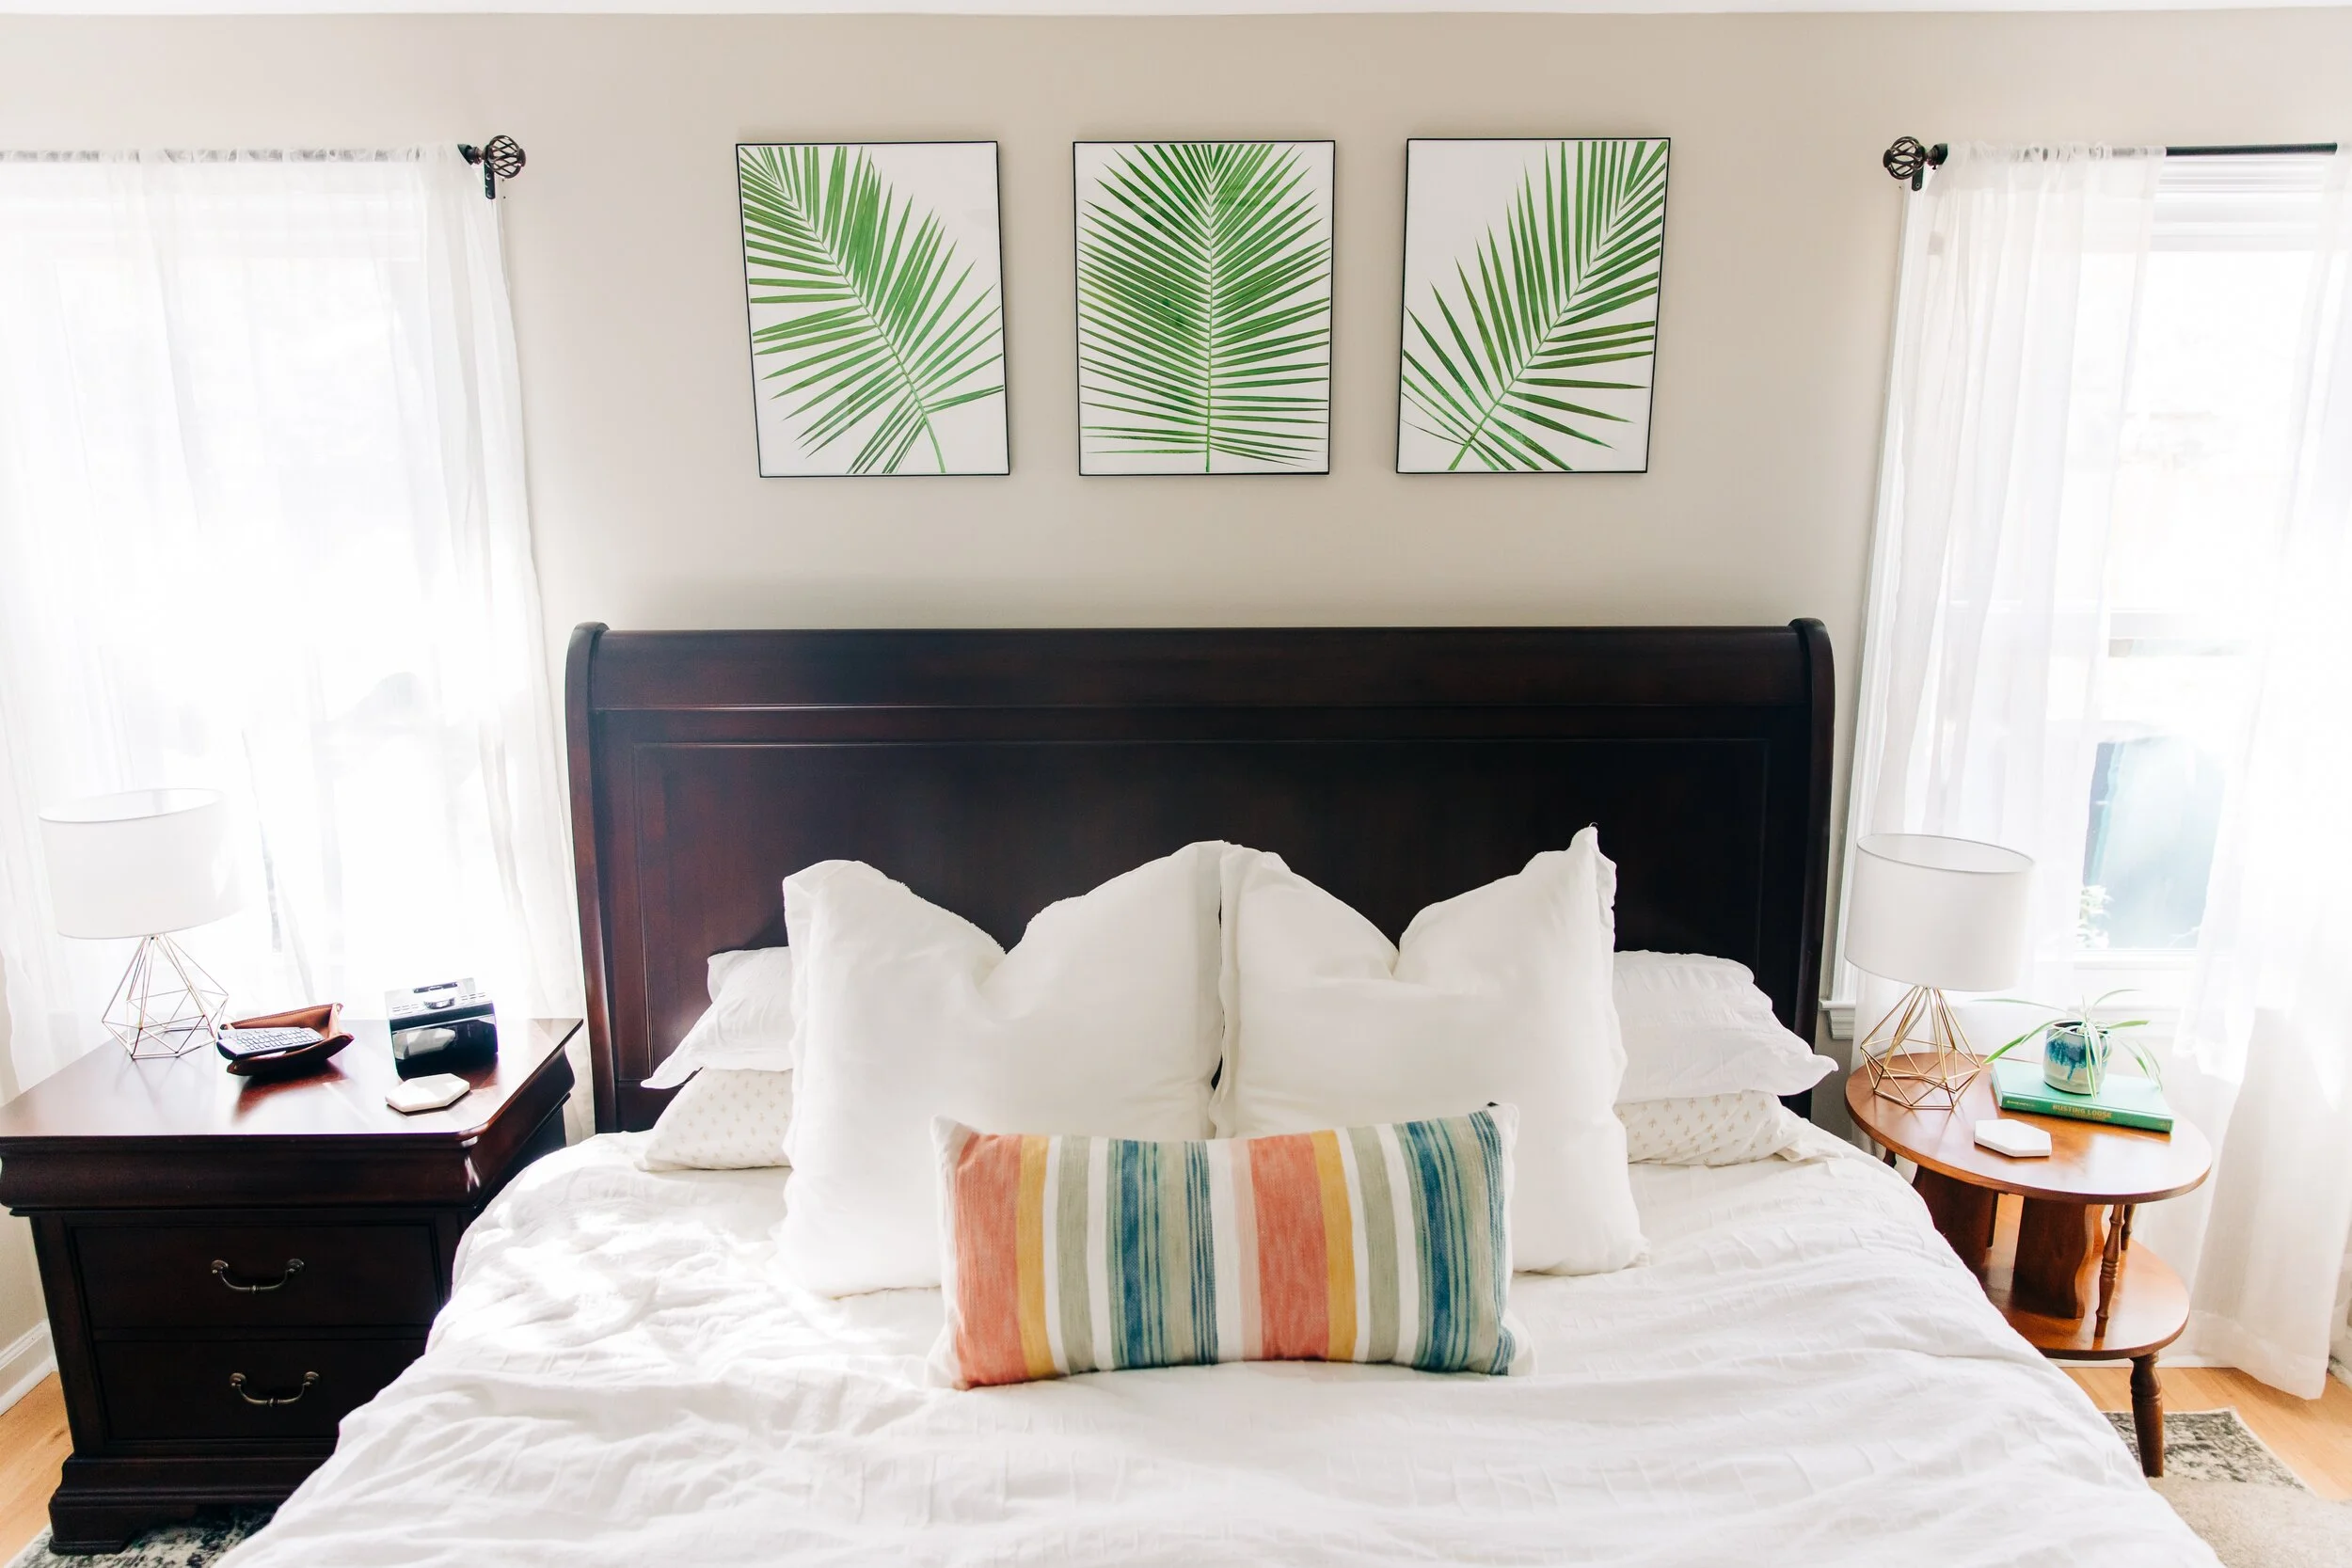
photo by dreampop media

Bedroom sources:
Palm art: Urban Garden Designs (local art!)
Sheer curtains: Target
Gold lamps: Target
Textured duvet cover: Target
Square white pillows & Lumbar pillows: Target
Jersey sheets: Amazon
Rug: Wayfair
Furniture: Old, Haverty’s
Nightstand: Vintage, from my grandmother
Heads up! My posts may contain affiliate links. Should you purchase anything through the link, you won’t pay a penny more but I’ll get a small commission, which helps keep the lights on. Thanks so much for your support!